Baking as Prayer: Pan de Muerto

01 November 2008 Filed In: all the rest, bread, Breads, Halloween


This morning I found myself up early to take the Pan de Muerto, or “Bread of the Dead,” dough out of its nest in the refrigerator to roll into balls and bake.  Baking has always been a form of meditation or prayer for me.  So often, when I am baking something, I’m also remembering the person who taught me that recipe, a meal we shared, or the particularites of a friend or family member’s palate.

My grandmother, “Gran” as I called her, packed heat (yes, carried a gun), swore like a sailor, could quote whole passages of Shakespeare, dressed with impeccable tailored panache, was a Buddhist in the 1940’s, and helped me bake my very first batch of cookies, sugar cookies which we flavored vanilla, anise, and lemon and then baked and decorated together.  While pregnancy and caring for two small children has taken away a lot of brain cells, the memory of that day, that kitchen, those smells, and her instruction is clear as a bell.  And, my friends, from that day on I was hooked on cooking things.  Gran’s mother, my great-grandmother Eva, ran a successful bakery back in the time when “good” Southern women of means stayed at home.  Along with all the questionable character traits, the emotional snafus, and the fierce independence, it is a pleasure to have inherited a love for baking from my maternal line. 
The recipe I used for my pan was taken from (the local food goddess) Barbara Kingsolver’s inspirational book Animal, Vegetable, Miracle.  One of the best things about the Mexican “Day of the Dead” is that it allows and even demands a festive attitude, not being completely mired in all of the sadness that usually surrounds a loved one’s death and subsequent absence.  For this day, the Dead walk among us and are part of our daily bread.  Celebrate, gather your ingredients, and contemplate your ancestors and all of those who’ve gone before you.  

Cooking Class: Little Yummies’ Halloween Snack Cakes

30 October 2008 Filed In: cakes, chocolate, cooking class, Desserts, Fall, Halloween, pumpkin, Soy-free, Vegetarian


Not that a Little Debbie snack cake (gasp!) has ever passed either one of my foodie kids’ lips, but I have been thinking about those snack cakes in earnest lately.  It all started while I was visiting the South a month ago.  I practiced/tried out being a Suburban mum and did things like go to the grocery and read magazines in the check-out.  In Southern Living, there was a huge Halloween spread that involved dolling up the top of Little Debbies with a chocolate ghost.  My first impulse was, “Ewwwwww!”  Then, it got me thinking that not all snack cakes are created equal and that, given fantastic ingredients, a snack cake might shine.

Let it be known that these demand a fair amount of fixiness and devotion, but they are worth it and can be a project done over the next couple of days.  We passed on using chocolate bark to glaze the cakes since it has a bunch of vegetable shortening, but we splurged on Valrhona bitterweet chocolate for the glaze and spicy hot chocolate from Jacques Torres in lieu of regular cocoa.  We put the family test-run supply in the freezer for a day and then the refrigerator for another day, and by all accounts, they were improved.  That’s if you can show restraint or you don’t have a bevy of kids to treat.
The Yummies, despite some Fall-overscheduling-induced disorganization on my part, stayed focused and rocked the the free-form ghost decorating. Promise that there will be savory dishes back on the menu again soon, but for now, here’s to treats.  Happy Halloween, Yums, Mums, Daddios, and Friends!

Little Yummies’ Halloween Snack Cakes

For the cake:
*12 T. unsalted butter, plus more to grease the pans, room temp.
*1 c. whole wheat pastry flour
*1 1/4 c. unbleached all purpose flour
*1 T. cornstarch
*1/4 c. spicy cocoa powder***
*1 t. baking powder
*1 t. baking soda
*1 t. ground cinnamon
*3 eggs, preferably organic, room temperature
*2 t. vanilla
*1 c. plain yogurt, room temperature

For the Filling:
*8 0z. cream cheese, room temperature
*1 c. pumpkin puree
*2 T. honey

For the glaze and decoration:
*8 oz. bittersweet chocolate, chopped with a serrated knife
*3/4 c. heavy cream
*Rolled fondant
*some corn starch, to roll out the fondant

Preheat your oven to 350 degrees F.  With your mini-chef, butter two rimmed (jelly-roll) baking pans, line the bottoms and sides with parchment and then butter the parchment.  (This is sort of like goal-oriented finger painting.)

In a medium bowl whisk together the flours, cornstarch, cocoa powder, cinnamon, salt, baking powder and baking soda.  Set aside.

Put the butter and sugar in a large bowl, preferably the bowl of an electric mixer with the paddle attachment.  (If you’re mixing by hand, you won’t have to worry about little hands, but the electric mixer is a whole lot easier if your mini-chef can resist sticking his or her hands in while the mixer is going.)  Cream the sugar and the butter till fluffy and light.  Add the eggs, one at a time, and the vanilla, and beat those in well.  Now, give your mini-chef either the yogurt or the flour mixture because you will be taking turns making additions to the batter.  First the chef with the flour mixture puts in a little bit, and then the one with the yogurt adds a little.  Do this back and forth 3 times, incorporating the ingredients well and scraping down the bowl a couple of times along the way.

Divide the batter between the two baking sheets.  Using a rubber spatula or an off-set spatula, if you have one, let your mini-chef spread out the batter so that it is in an even layer in the pan.  If your Yummy is very small, they might not understand how to make it even and dig into the batter.  No worries.  Let them do the best they can, and then you can smooth it out for them afterward.  The Big Person will put the sheets into the oven and bake for 22-25 minutes, or until the top is starting to brown and a toothpick stuck down into the cake comes out clean.

Meanwhile, make the filling with your mini-chef.  Simply combine all three filling ingredients in a small bowl and stir with a fork.  Put that in the fridge.

When the cakes come out of the oven, let them cool completely, cover them with plastic wrap, and stick them in the freezer for at least 30 minutes and preferably a few hours.
Just before you’re ready to assemble, set out the cakes, a small round or square cookie cutter, a seasonal cookie cutter, and the filling.  Using the cookie cutter, cut as many little cakes as you and your mini-chef can fit out of each of the sheet cakes.  Spread a small amount of filling onto one of the cut-out’s flat sides, and then sandwich another cut out’s flat side on top of that.  Repeat with all of the cake cut-outs, placing them a half inch apart from one another on a piece of wax paper or parchment.

Big Person Time: Bring water to a boil in the bottom of a double boiler.  Bring the cream in the top pan of the double boiler, whisking constantly.  Remove the pan from the heat and whisk in the chocolate till fully melted.  Continue to whisk till the glaze cools a bit, so that it doesn’t scorch, and then set it aside while you roll out the fondant.

Sprinkle a bit of the cornstarch onto a cutting board and onto your rolling pin.  Roll the fondant till it’s 1/8 inch thick.  Show your mini-chef how to dip their cookie cutter into the cornstarch, and then let them cut out as many fondant toppings as they can fit.  You can also do free-form ghosts, as we did for Halloween, and stick on sugar eyes with a bit of water.  

Time to assemble: Pour a little of the glaze over the top of each small cake.  You can spread it out for a more formal look, or just drip for a less formal one.  Top with the fondant cut-outs.  Let the snack cakes set up for at least 15 minutes before devouring.  


Anne And Mira’s Pump-Chip Ice Cream Sandwiches

28 October 2008 Filed In: chocolate, cookies, Fall, Halloween, pumpkin, squash, Thanksgiving, Winter


Our friend Anne was born on the same day as my daughter Mira and made it out into the world a mere half an hour before her, so the girls are little twin stars. When Anne was still on the inside and ML was taking my prenatal yoga classes at the Kula, we had no idea that our daughters were going to be life-long friends and would be meeting up for cookie-baking sessions over 3 years later.
This recipe for pumpkin, chocolate-chip cookies is KILLER, and should definitely be a part of your Halloween treat-baking. After trying to finagle my (other) friend Jamie out of her business partner’s sister’s in-law’s next door neighbor’s childhood friend’s grandma’s top secret recipe for a year now, with no positive results, I finally had to sit down and figure out something for myself. Anne and Mira really did most of the work here and all of the entertaining. That night, after the girls had eaten a princess dinner, involving ML’s delicious turkey meatballs and several bites of princess broccoli, they sat down to eat warm pump-chip cookies that they dunked in tall glasses of cold milk. I took it a little further and sandwiched locally made vanilla ice cream in between, really, for sheer trick-or-treat hedonism.
Anne and Mira’s Pump-Chip Ice Cream Sandwiches

*4 c. all purpose flour
*2 t. salt
*1 T. cinnamon
*1 t. nutmeg
*2 t. baking powder
*2 c. light brown sugar, packed
*1 c. sugar
*1 c. (2 sticks) of unsalted butter, softened
*1 c. pumpkin puree
*2 t. vanilla
*4 eggs, preferably organic and room temperature
*16 oz. of bittersweet chocolate chips

Line two baking sheets with silpat mats or grease them with a little butter.

Measure out the flour, salt, spices, and baking powder into a medium sized bowl. Encourage your mini-chef to learn how to level the flour and the baking powder and try it on her own. Then, she can give all those dry ingredients a gentle whisk.

Next set up a very large bowl with the sugars and the butter, and cream them with an electric mixer or beat them till fluffy with a wooden spoon. Guide your mini-chefs hand with this but also let them be a big part of the fun mixing. Beat in the pumpkin puree. Crack the eggs into another small bowl, so that you can fish out the shells as the mini-chefs practice cracking, and then beat them into the butter-sugar mixture, one at a time. Beat in the vanilla.

Scrape down the bowl, and stir in the flour mixture. Definitely let your Yummy do the special pour in of the chocolate chips and fold them in together. Put the mixture in the fridge for at least 30 minutes and maybe even a few hours to chill. Preheat your oven to 350 degrees F.

Using a tablespoon or a small ice cream scoop, make little balls out of the batter and drop them onto the baking sheets. Let your mini-chef pat them down like a pancake. As they bake, they will not spread out very much, so you can space them pretty close together. Bake 9-12 minutes.

After the cookies have baked, have been cooled a minute, and spatula-ed onto a cooling rack for a few minutes, you and your mini-chef have a two options: Dunk in big glass of cold milk and/or put a small scoop of vanilla, chocolate, pumpkin, caramel, cinnamon, and the list goes on ice cream in between two cookies to make a sandwich. All the sandwiches can be assembled and put to stay cold on a baking sheet in the freezer till ready to serve.

Meat Rock Star, Fleisher’s Grass-Fed and Organic Meats, Is Knocking on Our Door

27 October 2008 Filed In: all the rest, meat

Before getting pregnant and having children and a husband who are huge fans of meat, I was almost completely vegetarian. One of the families for whom I was a private chef was vegan, so a good deal of my cooking and preparing and eating was devoted toward delicious vegetarian foods. Then I fell in love with a man who eats things like steak tartare, got pregnant, and, because my body didn’t have extra stores of iron and dense protein, I found myself in a bit of trouble nutritionally and needing to revamp my diet.
My feeling is that, if our family is going to eat meat, we are going to eat very high quality meat that has been raised humanely, not pumped up with hormones, and has been allowed to graze on grass, if that is the animal in question’s natural diet. The reasons to buy and eat this way are too numerous to get into right away, but I promise that, during November, I will try and talk about some of those reasons, especially as they relate to cooking for and with your kids. In short, though, the key is quality over quantity.
When my upstate-living sis-in-law wrote me to let me know that Fleisher’s would be beginning home delivery to New York City, Brooklyn, and Long Island, I squealed. Right away, I put my name on the mailing list and emailed Jessica to see if she’d do a little write-up about their business. She’s a new mommy, too, and I’m hoping that she might be back to share a couple more recipes as her son gets bigger. Seriously, we’re all salivating over her brined pork chop recipe linked to below. If you don’t live in the New York City area, please use this as inspiration to check out your local butchers’ sources. Here’s what Jessica Applestone had to say:
My husband Joshua and I started Fleisher’s Grass-fed and Organic Meats four and a half years ago in Kingston, NY. At the time Josh was a vegetarian, a chef, and a third generation butcher. I was, for many years, a vegetarian myself (with a bacon exception) but looking to eat and cook healthy, sustainably-raised local meat. At the time the only thing that I could find was farmers who wanted to sell me sides of beef, which would have taken me three years to work my way through, or frozen meat at the farmer’s market which I wasn’t always sure what to do with or even sometimes what it was.

It seemed to us that there must be other couples in “mixed” marriages and foodies who just wanted a simple freshly cut steak or chops and some advice on how to cook them. And so Fleisher’s sprang into being, Josh became a carnivore (it was our nitrate/nitrite free homemade bacon that turned him), and we suddenly found that there were, in fact, many, many people who were looking for the kind of meat that we were selling.

We source directly from local Hudson Valley Farms and only sell meat that comes from well-treated, healthy, pasture-raised, drug-free animals. Our products are so good, we were recently named “one of the best butchers in the country” by Bon Appetit magazine, and Saveur magazine chose us for their Top 100 in 2008.

Until recently you have had to visit one of our shops to enjoy our products. That’s about to change. Fleisher’s Grass-fed and Organic Meats is about to start a door-to-door, fresh meat delivery service to Manhattan, Brooklyn and Long Island City. We will bring whatever it is you want right to your home or office. And everything that arrives on your doorstep is cut, ground and packaged the same day.

Not only have we been expanding our business, but our own family has been growing as well. On June 30, I gave birth to Isaiah Wolf Fleisher (perhaps a 4th generation butcher?!) and have come to realize how important quick, healthy meals are. We always encourage our customers to eat less rather than more meat, fill your vegetables and fruit, and use meat in small amounts. It’s healthier and, of course, more economical, which in these times is no small thing.


Dinner tonight is pork chops with a side of lentils. Check out our brining recipe in November’s Food & Wine here. I cannot wait to make it for Isaiah some day. Make more time and share the experience of food with your family, taste new things, and let your kids know where their food comes from. And, if you are interested in home delivery, go to our website, click on the NYC Delivery tab, give us your information, and we will keep you updated.

Cooking Class: Autumn Fruit Crumble with Frangelico Whipped Cream

23 October 2008 Filed In: apple, Christmas, cooking class, Desserts, Fall, pear, pies, plum, Soy-free, Thanksgiving, Vegetarian, Winter


Since last year when most of my students were two-year-olds and significantly more truculent around the food and one another, I’ve held in the back of my mind a vision of how and when to teach them to make and roll out pie crust.  My own daughter already knows the basics.  She requested a pie-making session the other day, “Because it’s starting to get verrrrrrry chilly, Mama, and when it gets chilly, we get to make pies.”  
While most families might make pie all year round, with a peak in Summer when the berries, peaches and such are ripe and ready, Mira is absolutely right.  Pie, for us, is a Winter staple and a feast food.  Our  Summer dessert days, instead, are marked with ice cream cones or balsamic berries with cream.  If we are going to go all out and actually make a warm dessert,  we make crumbles instead.  In fact, crumbles sustain our family’s treat nights pretty much all year round, even in the darkest, hungriest months in which we’re forced to move to frozen fruits.
Before I give the recipe for our crumble, I would like to say that making a crumble requires more feeling than accuracy or recipe.  The truth is that crumble-making is so simple that it requires you only to relate to the ingredients you have on hand.  If the fruits are juicier, put a couple more tablespoons of flour and/or butter in with the fruit to firm things up.  And please, please feel free to improvise with whatever you like and whatever is available in season.  
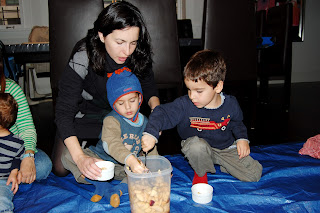
On Wednesday the last of the plums at the  greenmarket were looking orphaned, so I adopted them to vamp up our crumble.  In our class, too, we have a mini-chef with nut allergies, so there are absolutely no nuts in this recipe.  When I’m making it for my own family, I chop or grind pecans and almonds and mix them in with the crumble top.  The kids have definitely got the making things by feeling part down.  I see pie crusts on the horizon.
Autumn Fruit Crumble with Frangelico Whipped Cream

For the crumble:
*2 c. apples, peeled cored and sliced fairly thin
*2 c. pears, peeled cored and sliced fairly thin
*1 c. plums, washed well, pitted and cut into chunks
*the juice of a half of a lemon
*1/3 cup of brown sugar, packed
*2 c. all purpose flour (or a mixture of any other flours: gluten free, spelt, almond, etc.)
*1 t. baking powder
*1/2 t. salt
*1 t. cinnamon
*a couple of big handfuls of rolled oats
*2 T. flaxseed meal
*1 t. vanilla
*8 T. (1/2 c.) unsalted butter, chopped into 10-12 chunks and chilled
For the Whip:
*2 c. heavy cream***
*1 t. vanilla
*1 T. Frangelico (optional but highly recommended)
*2 T. maple syrup

Preheat the oven to 375 degrees F.  Paint a 9×13 inch baking pan with butter with your mini-chef.  

More Mini-chef: In a large bowl, toss the fruit with the lemon juice and a tablespoon of the brown sugar.  Encourage your mini-chef to toss the fruit with his hands and talk about how the lemon juice has to cover every single piece of fruit in the bowl.  Let your Yummy arrange the fruit in the baking dish as he sees fit.

Now in a medium-large bowl, whisk together the rest of the brown sugar, the flour, cinnamon, salt, baking powder, oats and flaxseed meal.  Set out two safe knives to work with, and then go to the fridge and pull out your butter.  Your mini-chef can drop the butter pieces into the flour mixture.  You will both take ahold of the knives and begin cutting the butter into smaller pieces as you cover those smaller pieces with flour.  (You can also, of course, use a pastry cutter if you happen to have one.)  Once the butter pieces look like the oft-mentioned “small peas,” your work is done.

Sprinkle the flour-butter mixture over the fruit till the fruit is completely hidden.  

Big Person: Put the crumble into the oven and bake till the top is golden brown, about an hour.  

Together: Meanwhile, place the cream, vanilla, and the Frangelico in a medium sized bowl.  Using either a hand-held mixer or a wire whisk and some elbow grease, beat the cream till it begins to set up a bit.  Then add the maple syrup slowly.  Refrigerate till ready to serve.

When the crumble is out of the oven and has cooled for a few minutes, spoon individual serving onto plates or into bowls and top it with the cream.
***If you have dairy allergies or are Vegan, you can make a simple vegan topping using soy yogurt and the rest of the whipped cream ingredients listed above.  You might want to add a touch more maple syrup to counter the tang of the soy yogurt.